
MX™ Connect Cases
MX™ Connect Cases is a case management workflow for submitting, tracking, and resolving merchant requests, issues, and reviews across desks, products, and partners.
Introduction
The MX™ Connect Cases feature is an electronic workflow designed to streamline communication and request handling for merchants. Cases allow users to submit inquiries, place orders, request changes, and initiate reviews while maintaining full visibility into status, ownership, and resolution. This guide reflects the current MX™ Connect interface and workflows and aligns with existing business processes.
In this guide, you’ll find:
- An overview of case queues and filtering options
- Step-by-step instructions for creating and configuring cases
- Detailed explanations of Issue Types, SLAs, and notifications
- Guidance on notes, attachments, and case history
- Case status definitions and closure processes
- Reporting and summary views for tracking case activity
Case Queues
MX™ Connect includes three primary case queues that organize cases by ownership and status.
My Cases
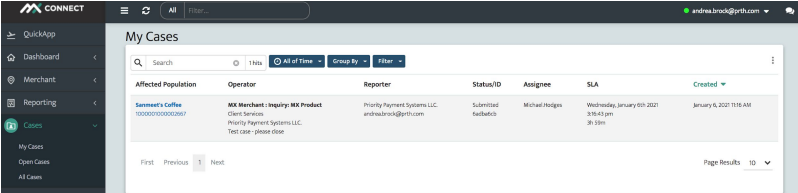
- Cases you submitted, are watching, or are assigned to you
- Displays only open cases by default
Open Cases

- Cases actively being processed
- Can be filtered by Submitted or In Progress status
All Cases

- Displays all cases regardless of status
- Filters available for Submitted, In Progress, Pending Closed, Closed, and Rejected
Filtering Cases
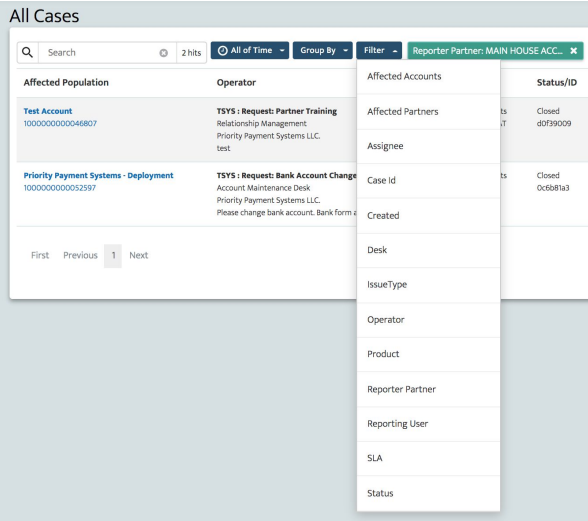
Filters help narrow results and locate specific cases efficiently.
Available filter options include:
- Issue Type
- Desk
- Product
- Assignee
- Affected Accounts
Filtering by Affected Accounts allows users to view all cases associated with a specific merchant.
Creating a Case
A new case can be created in one of three ways.
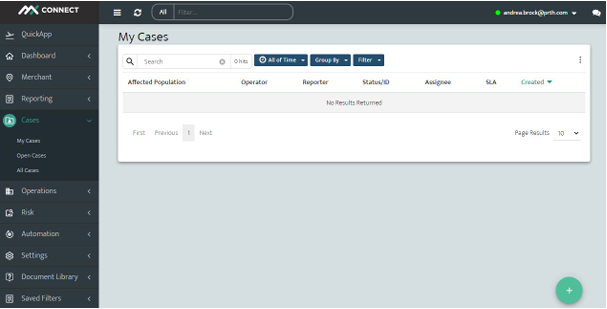
From the Cases Menu
- Select Cases from the left navigation
- Choose My Cases, Open Cases, or All Cases
- Click the plus (+) icon in the bottom-right corner
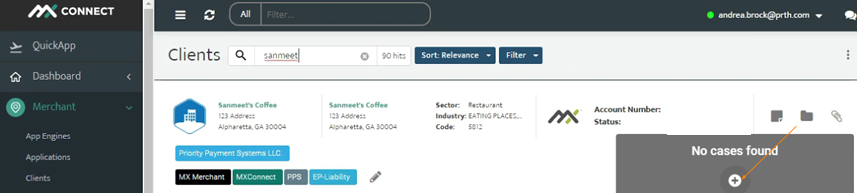
From the Clients Grid
- Locate the merchant in the Clients grid
- Select the file folder icon
- Click the plus (+) icon to create a new case
From the Merchant Record
- Open the merchant record
- Select the file folder icon from the right-side navigation
- Click + Add Case
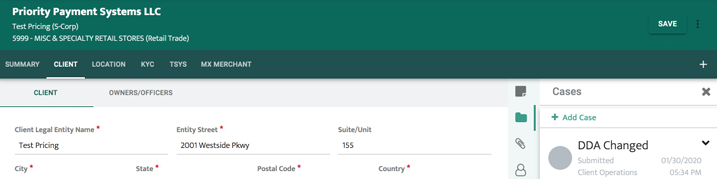
This method allows case creation without leaving the merchant view.
Configuring a Case
Applying Filters
- Click the green Filter button
- Select the appropriate Desk
- Select the related Product
- Click Default Search to save these selections for future cases
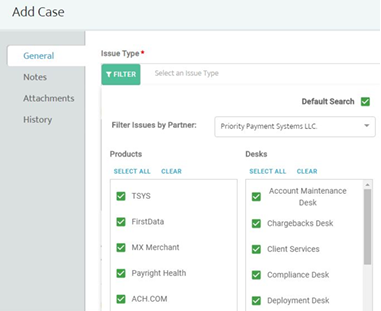
Selecting an Issue Type
Issue Types fall into four categories:
- Inquiry
- Order
- Request
- Review
Users can search by name or scroll through the list.
Common Issue Type Examples
- Request: New File Build
- Inquiry: Equipment Billing
- Order: New Terminal
- Order: Paper / Supplies
- Request: Next Day Funding
- Request: Release of Funds
- Request: Reinstatement of Account
- Review: Statement
Issue Type Behavior
- Issue Types are based on the selected processor (TSYS or Fiserv)
- SLA timing appears after selecting an Issue Type
- Issue Summary should clearly describe the request
- Assignee remains blank until the case is assigned
- Watchers may be added or removed
- Affected merchant accounts or partners must be selected
Notifications and Partners
- Email addresses may be added for automatic status notifications
- Selecting Notify Me ensures the case originator receives updates
- Partners assigned to affected merchant populations are automatically displayed
- Additional downline partners can be added as needed
Attachments
Attachments are used to upload required documentation such as:
- Signed merchant forms
- Change request forms
- Voided checks
- Bank letters
Attachments can also be saved directly to the merchant record.
Important Attachment Reminder
Cases may be rejected if:
- Required forms are missing
- Outdated forms are used
- Supporting documents are not attached
- Merchant signatures are incomplete
Notes
Notes should be used after a case is in progress to:
- Add missing information
- Respond to processor questions
- Provide clarification
To add a note:
- Enter the note in the text box at the bottom of the screen
- Click the right-arrow icon
- Select Email to notify processors and listed recipients
- Click Save
Case History
The History tab provides a complete record of all activity from case creation through closure.
Case Review
Selecting a case opens the case detail view, which displays:
- Status
- Issue Type
- Issue Summary
- Estimated Completion Date (shown in red if past due)
- Assignees and Watchers
- Affected Accounts and Partners
- Notes, Attachments, and History

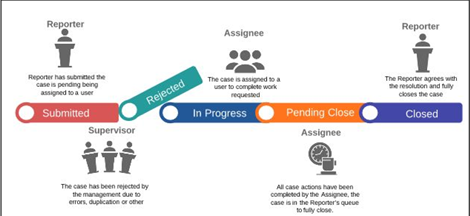
Case Status Definitions
- Submitted – Case is being assigned and SLA begins
- In Progress – Case is actively being worked
- Rejected – Case rejected due to errors or duplication
- Pending Closed – Case completed and awaiting reporter confirmation
- Automatically closes after two weeks
- Closed – Reporter confirms resolution and closes the case
Closing a Case
To close a case from Pending Closed:
- Open the case
- Change the status to Closed
- Enter a resolution
- Click Save

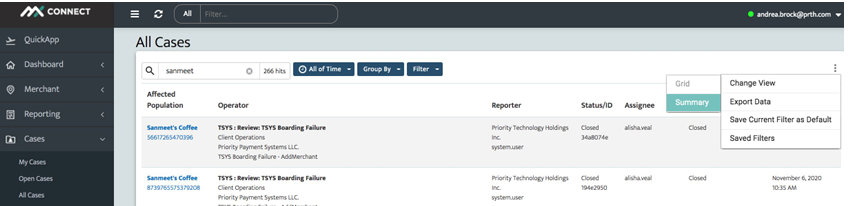
Reporting and Metrics
Case reporting is available through the All Cases view.
Summary View
- Navigate to All Cases
- Select the vertical ellipsis (⋮)
- Choose Change View
- Select Summary
Available Metrics
Metrics are provided by:
- Case Type
- Desk
- Reporter
- Affected Account(s)
- Partners
- Status
- Assignee
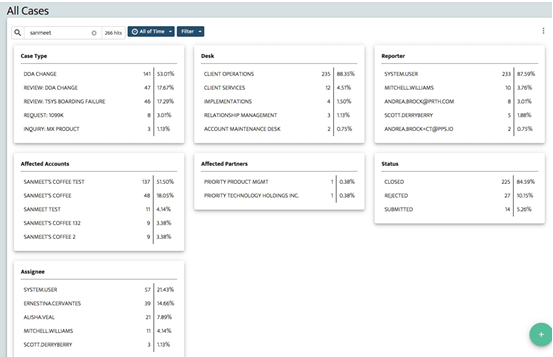
Metrics include case counts and percentages based on the selected timeframe.
Updated 30 days ago