
MX™ Connect Create a User
Learn how to create a new user in MX™ Connect, including partner selection, identity setup, security configuration, and invitation delivery.
Introduction
This guide explains how to create a new user under a partner account in MX Connect. Users control who can log into MX Connect and what level of access they have within the system.
In this guide you'll find:
What is a User?
A User in MX Connect is an individual account that allows a person to log into the platform with defined permissions, security requirements, and application access.
Each user belongs to a specific partner account, and their permissions determine what they can see and do inside MX Connect.
Users are typically:
- Partner administrators
- Sales reps
- Support staff
- Risk or underwriting personnel
- Operational users who need access to MX Connect tools
Creating users ensures that the right people have the right access based on their role.
How to Create a User
Navigate to the User Management Screen
- Go to Security in the left navigation menu.
- Select Users.
- Click the (+) button in the bottom right corner to create a new user.
This opens the New User screen.
Select the Partner Account
Each user must be associated with a partner.
- In the Partner field, search for and select the correct partner.
- Example: HK UAT Partner
This ensures the user belongs to the correct partner hierarchy.
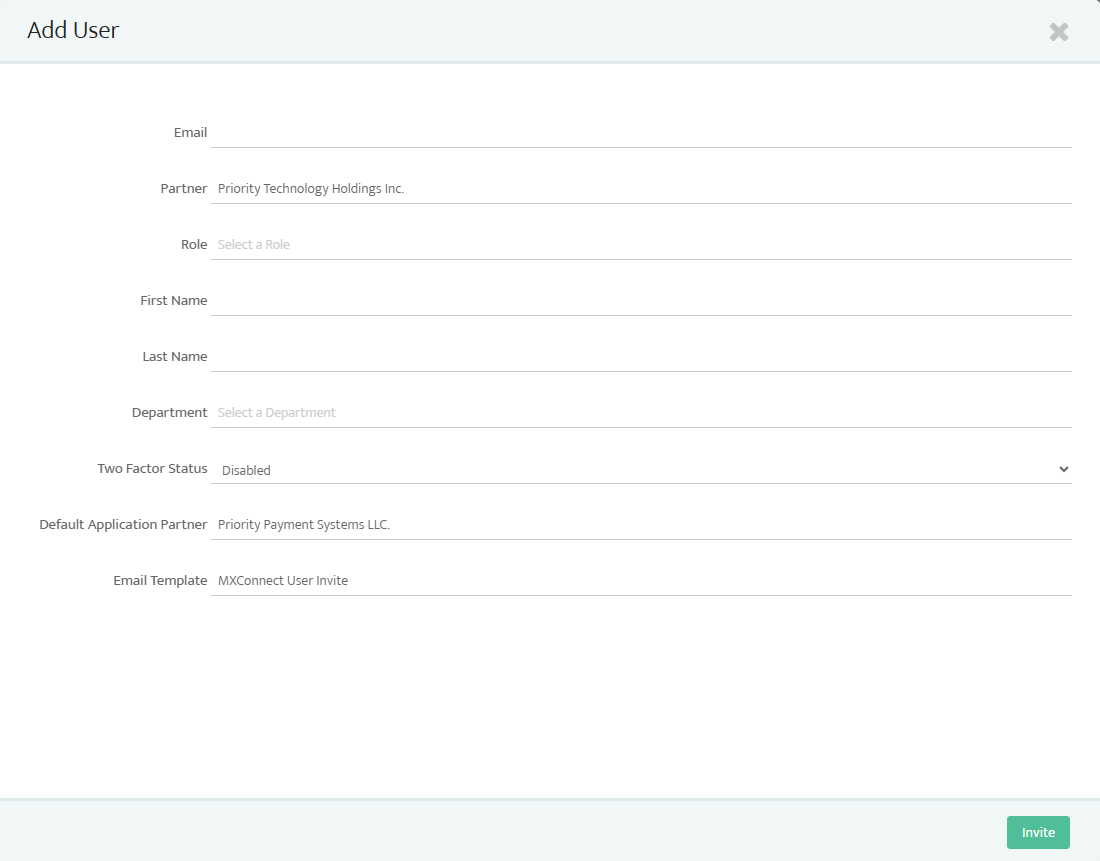
Enter User Identity Details
Fill in the following fields:
| Field | Description |
|---|---|
| Must be unique and used as the user’s login. | |
| First Name / Last Name | Basic user identity information. |
| Role / Department | Optional; used to classify internal partner roles. |
MX Connect requires unique email addresses for all user accounts.
Assign User Type
- Select a User Type such as:
- Head Office User (full partner-level access)
- Standard User
- Restricted / Role-based User
In the example:
The user is created as a Head Office User to ensure they have full access to manage the partner’s merchants, settings, and users.
Configure Security Settings
- Two-Factor Authentication (2FA)
- All users need a 2FA configuration.
- Email Templates
- Select the appropriate invitation email template if available.
- If the partner does not yet have custom templates, the default system template is used.
Assign Default Application
Choose the default application. The user will be taken into when they log in.
Examples:
- MX Connect (Admin functions)
- MX Merchant
- Partner Portal / Sub-applications
In the demo example:Default application = HK UAT Partner
This ensures the user lands in the correct partner environment.
Send the User Invitation
- Review the user information and settings.
- Click Send Invite.
This sends an email invitation containing:
- A link to activate the account
- A temporary or initial login process
- Instructions to set a password (and 2FA if required)
Once the invite is accepted, the user becomes active under the partner.The user will now appear under the selected partner and will have access according to their configured permissions.
Updated 30 days ago