
MX™ Connect Create a Partner
Step-by-step guide to create and configure a new partner in MX Connect, including legal info, permissions, underwriting, and approval.
Introduction
This guide walks you through the steps to create a partner in MX Connect, from opening the Add Partner screen to setting the partner status and type. Use it to complete the initial setup before entering full partner details.
In this guide you'll find
- How to access the Add Partner screen and create a new partner record
- Steps to complete partner information, including legal, contact, and banking details
- Guidance for configuring underwriting, KYC, permissions, and roles
- Instructions for saving, approving, and managing the partner record
What is a Partner?
In MXC (MX Connect), a partner is an organization or individual—such as an Independent Sales Organization (ISO), agent, or reseller—that collaborates with the platform to help onboard and support merchants. Partners play a key role in expanding the reach of MXC by introducing new merchants and managing their ongoing needs.
How to Create a Partner
Get to the Add Partner screen
- Go Settings and select Partners .
- Select the (+) button in the bottom right corner.

Complete the partner information
General information
Set the Status
- Draft: Partner record is created but incomplete.
- Provisional: Partner is partially verified with limited access.
- QA: Partner is under internal review for accuracy.
- Approved: Partner is fully verified and active.
Select the Partner Type
Choose the partner type. Common options include:
| Partner Type | Description |
|---|---|
| EPS / Executive Partner | High-volume partner with priority handling. |
| Referral Partner | Referred by another partner or external source. |
| ISO (Independent Sales Organization) | Standard sales partner. |
| Agent / Sales Rep | Individual sales representative. |
| Wholesale / Complex Partners | Partner managing multiple sub-partners. |
| Reporting Only | Partner with reporting access only. |
Example: Select ISO for this guide.
Legal and Location Information
Fill in the partner’s legal entity and contact details:
- Legal Name: Enter the official legal name (e.g., HK Test Partner).
- Address: Include street, city, state, and ZIP.
- Legal Entity Type: e.g., Single Member LLC.
- Email: Enter a valid contact email.
- Organization / Tax Info: Include state of formation and tax ID (EIN).
Note: If the system has autocomplete issues, manually verify city and state entries.
Owner and Banking Information
- Add owner information (name, email, phone).
- Add banking info for deposits and fees (if applicable).
- For partners using passport accounts or other financial arrangements, configure as needed.
Contacts, Notes, and Attachments
- Add any agreements or contracts relevant to the partner.
- Add notes or attachments for internal reference.
- These fields can often be completed later.
Underwriting & KYC (Know Your Customer)
MX Connect allows configuration of underwriting and KYC for partners:
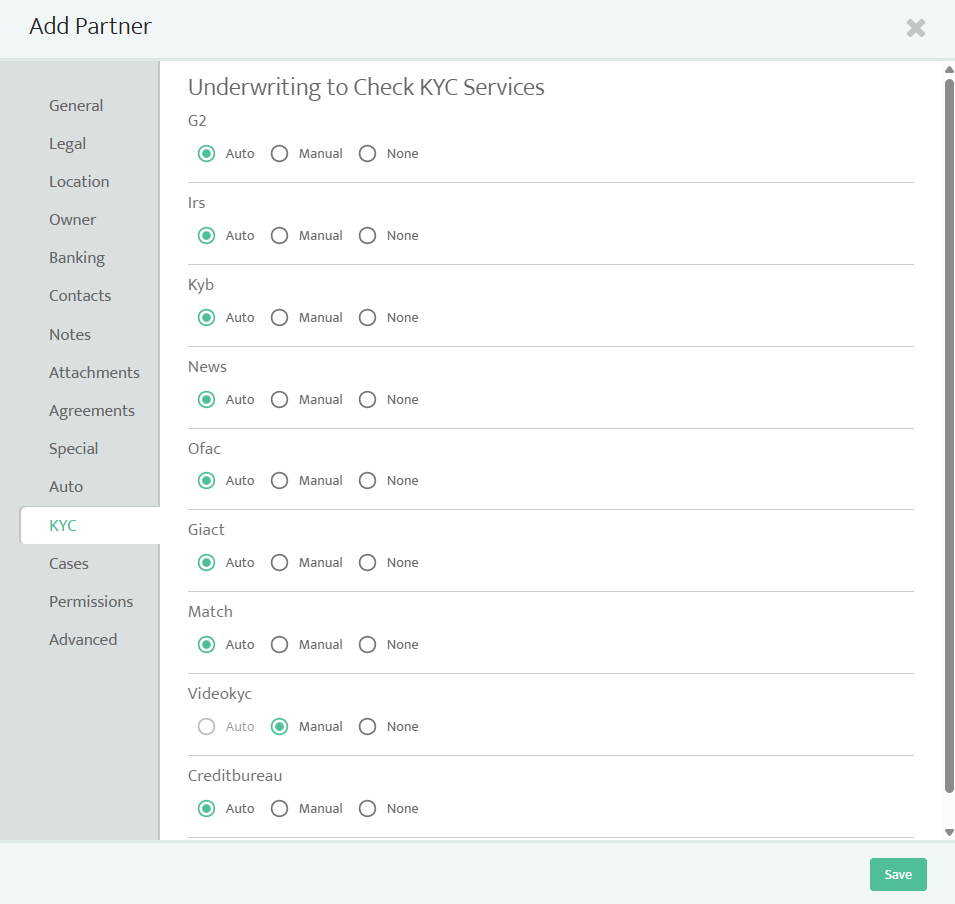
- Auto Approval Criteria: You can configure partners for automatic approval if they meet certain standards, such as:
- Transaction volumes (e.g., $200,000/month)
- Average purchase amount
- Minimum guarantor ownership percentage
- Credit report checks (SSN, bankruptcy, credit criteria)
- KYC / KYB checks
- Approved merchant category codes (MCCs or SIC codes)
- Manual Review:
- If auto-approval is not appropriate, all underwriting and KYC checks can be reviewed manually.
- EPS partners may handle their own checks.
- Credit Checks Fail-Safes:
- MX Connect prevents redundant credit pulls within 30 days to protect individual credit scores.
Cases and Roles
Configure what this partner can access and manage within MX Connect:
- Access to cases, operations, and risk modules.
- Ability to apply labels, configure product mappings, or update agreements.
- Permissions should align with partner type and contractual agreements.
- Advanced permission settings allow further customization per partner.
Note: Partners cannot edit other partners or see upstream/lateral partner accounts.
Advanced Settings
Set additional partner parameters:
| Field | Purpose |
|---|---|
| Parent Partner | If this partner reports to another partner. |
| Registered / Branded Status | Contractual designation of the partner. |
| Loss Liability | Specifies the financial responsibility of the partner for potential losses (e.g., 50% of losses). |
| External ID | Used to map legacy merchant/partner IDs for data migration. |
| Retention Amount / Bank Edit Limit | Risk management and reserve configuration. |
Save & Approve Partner
- Select ck Save to create the partner record.
- Ensure Approval Status is set (e.g., Approved).
- If required, set Loss Liability to a specific value (e.g., 0% if no liability assigned).
Once approved, the partner record exists in MX Connect but may have no active merchants or transactions until further configuration.
Updated 30 days ago